Oh yes! I said it! I’m in an attempt to cut my ties with as many store bought products as I can. I want to put in that little bit of extra effort and time and make things at home that are ultimately just as good if not better AND when all is said and done, I want to save money as well! Do you make anything at home instead of buying it already made? I’m seriously interested! I want to know! Tell me in a comment! I’ll love you for it!
Here’s what I’m already making at home:
- Laundry soap (I've posted the instructions for that on here.)
- Baby wipes (I can get just shy of 4 times the wipes for about the same price.)
- Body wash (I’m still perfecting this, so it’ll be a while before I post this)
- Diaper Genie refills
- Taco Seasoning
- Fabric Softener
I had to do all of my laundry with a wash board (for slightly longer than will ever entertain me…) while I waited for the washing machine to be replaced. I know that might be horribly useless information to the masses, but when I was faced with the prospect of that becoming a reality for me it was the collective information of about 5 blogs that gave me the information and (as ridiculous as this sounds) the confidence to believe that I could actually manage the task and not abandon my family in doing so. That being said, that post will be coming around eventually.
I’m also working on a bunch of low budget dinner recipes!!!! Super yummy stuff!
SO! I know that the baby wipes and the Diaper Genie refills aren’t gonna be the epicly amazing creations that you’re DYING to read about, but they are accomplishments! Don’t you ever get that overwhelming sense of self-accomplishment? Oh. My. GOSH! It’s totally my drug!
Baby Wipes! They totally feed my addiction!! My version of the wipes is adapted from Homemade Mamas .
Here's what you need:
1 roll of VIVA paper towels (a single large sheet roll costs about $1.57, if they're available I would recommend the select-a-size version though, it'll save you about 20 minutes.)
2 tbsp Baby wash (I use the lavender scented)
Baby oil (I use the lavender scented)
2 cups water (boiled and brought back to room temperature.)
A good kitchen knife.
A plastic container (large enough to fit 1/2 a roll of paper towel in.) ((I got a set of two square containers from Walmart for $2. I want to say they are about 8 inches tall.))
Here's what to do:
Cut your roll of paper towel in half. (This doesn't have to be absolutely exact, a close guess will do.)

I was a little OCD with cutting the frayed edges off. Oh well lol.


Remove the cardboard center from the paper towel. You can do this by running your finger in between the cardboard and the paper towel and pulling back on the cardboard. Repeat this two or three times and you should be able on the third try to pinch the cardboard in half and pull it free from the paper towel. (You might end up taking one or two sheets with you, its ok though, if your really worried about them you can pull them off of the cardboard and stuff them down to the bottom of the center of the roll.)


In the plastic container mix the room temperature water, 2 tbsp of baby wash and 1 tbsp of baby oil together.

Place the paper towel roll into to plastic container (cut side down) and put the lid on.

Let it sit there until all of the liquid is absorbed into the paper towels.
Then flip the closed container over and let it sit there for about 10 minutes or until the entire roll is thoroughly saturated.


Once that is done take the paper towel out of the container and tear the sheets at the perforated line. (If you have the select-a-size sheets you are done with this step. If you have the larger sheets you will also need to cut each sheet in half with a pair of scissors. I know that sounds crazy but the larger sheets are just too big to justify using.)
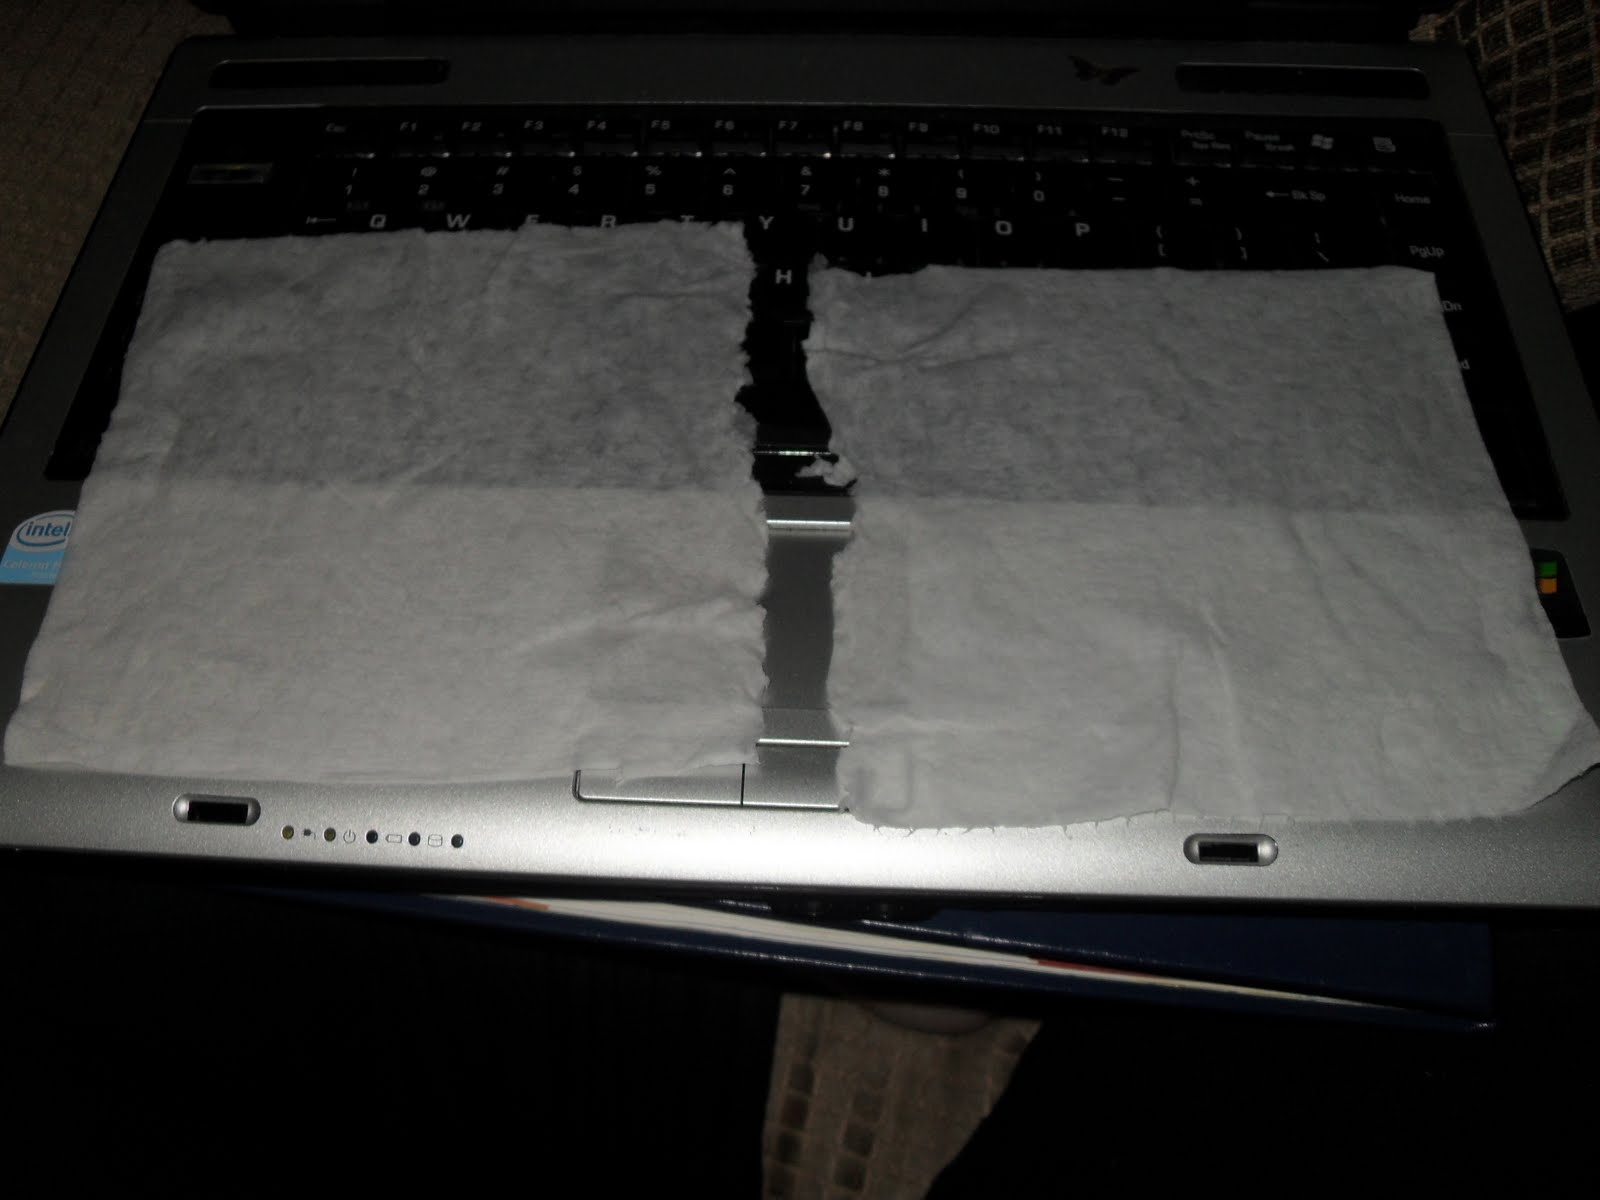 |
| This is one of the larger sheets cut in half. In my opinion that huge sheet would just be a waste. |
Neatly place the sheets back into the plastic container. Be sure to leave the lid on tightly when your not using the wipes to ensure they don't dry out.

And now you have your very own homemade baby wipes! Do you feel the sense of self accomplishment??? Oh man I love it!
---------------------------------
And while we're on the subject of baby things, since this one isn't really all that miraculous, it just got me out of a bit of a bind.
I have a Diaper Genie, I got really really lucky and I picked it up at a kids consignment shop in town for $5! It even had a Yankee Candle air freshener inside. Total bonus! lol. So anyways, it's not a crazy necessity, I know, but it does wonders for keeping my kitchen from stinking too horribly. The refills that get put in them is basically thin plastic that you tie off at the bottom close the container and feed diapers through the top until its full. Then you cut the plastic & tie it off again and start all over.
All you need is a refill shell and a regular kitchen trash bag.

You tuck the top edges of the trash bag down into the rim of the refill shell.

And then just stuff the rest of the trash bag in there.

Put the refill shell into the diaper genie and push the trash bag just past the spring loaded board to get it started.

After that use your genie normally!
Woot for two-for-one post!! =P